Prime Time: 7 Steps to Prime Your Exterior for Painting
Key Highlights
- Detailed inspection and cleaning techniques to ensure a flawless priming process.
- Importance of choosing the right primer for different surfaces.
- Step-by-step application and drying guidelines for optimal results.
- Lightmen Painting's expertise and customer satisfaction in exterior painting projects.
7 Steps to Prime Your Exterior for Painting
Why Priming Your Exterior is Essential
When it comes to exterior painting, the foundation is everything. Proper priming can be the difference between a paint job that lasts a decade and one that starts peeling in a few years. We've seen firsthand the transformative power of a well-primed surface. Let’s dive into why priming is so crucial.
Enhances Paint Adhesion
Primer acts as a glue that binds the paint to the surface, ensuring better adhesion. Without it, paint can struggle to stick, leading to peeling and flaking. I once had a client whose house had peeling paint because the previous painters skipped the priming step. After our thorough priming process, their new paint job has held up beautifully for years.
Seals the Surface
Exterior surfaces can be quite porous, absorbing moisture and compromising the paint job. Primer seals these surfaces, preventing moisture from penetrating and causing damage. This is particularly important in areas prone to rain and humidity.
Improves Durability
A good primer provides a solid base that enhances the durability of the paint job. It acts as a shield, protecting the surface and the paint from environmental wear and tear. This extra layer can significantly extend the life of your paint job, saving you money in the long run.
Provides a Uniform Finish
When painting over different materials or transitioning between colors, primer ensures a smooth and consistent finish. It helps hide imperfections and creates a uniform base that allows the paint to shine.
Step 1: Inspect and Clean the Surface
Conduct a Thorough Inspection
Before diving into any painting project, the first crucial step is to thoroughly inspect the surface. This initial inspection helps identify any potential issues that could affect the quality of the paint job. Look for cracks, peeling paint, mildew, mold, and any other surface imperfections that need to be addressed. During one of my own home projects, I discovered some hidden water damage behind a section of peeling paint. Catching it early allowed me to fix the issue before it caused more significant problems.Regular inspections can save time and money in the long run by preventing unexpected surprises. Make sure to take your time and be thorough, as any overlooked issue could compromise the final result. Use a flashlight and even a magnifying glass for detailed areas to ensure nothing is missed.
Cleaning Techniques
Once the inspection is complete and all issues are identified, the next step is cleaning the surface. A clean surface is essential for primer adhesion, which in turn ensures the longevity and durability of your paint job. Dust, dirt, and grime can prevent primer and paint from sticking properly, leading to peeling and chipping over time.
Pressure Washing for Large Areas
For large exterior surfaces, pressure washing is an effective and efficient method. It can remove dirt, mold, and old paint chips, leaving a clean surface ready for priming. However, be cautious with the pressure settings. Too high of a pressure can damage the surface, especially on older or more delicate materials. I once used too high of a pressure setting on an older wooden deck, and it ended up causing splintering. Always start with a lower setting and gradually increase it as needed.
Hand Cleaning for Delicate Sections
For more delicate or intricate areas, hand cleaning is recommended. Use a mixture of water and mild detergent to scrub the surface with a soft brush or sponge. This method is gentler and allows for more control, ensuring that delicate surfaces aren't damaged. It’s particularly useful for areas around windows, trim, and other detailed work. Remember to rinse thoroughly with clean water to remove any soap residue.
Removing Mildew and Mold
Mildew and mold require special attention. A solution of bleach and water (1 part bleach to 3 parts water) can effectively kill and remove these growths. Apply the solution, let it sit for a few minutes, and then scrub with a brush. Rinse thoroughly afterward. Always wear protective gear, such as gloves and goggles, when working with bleach solutions.
Tackling Stubborn Stains
For stubborn stains, a more robust cleaner might be necessary. Products specifically designed to remove stains from exterior surfaces can be very effective. Follow the manufacturer’s instructions carefully, and ensure the area is well-ventilated if you're using chemical cleaners.
Drying the Surface
After cleaning, it's essential to let the surface dry completely before applying primer. Any residual moisture can interfere with primer adhesion. Depending on the weather conditions, this might take a few hours to a full day. Using fans or heaters can help speed up the drying process if needed.
Final Inspection Before Priming
Once the surface is clean and dry, do a final inspection. Ensure all problem areas have been addressed and the surface is completely dry. This last check is crucial to catch any last-minute issues that might have been missed earlier.
Step 2: Repair and Patch
Fixing Cracks and Holes
Before diving into painting, it's crucial to address any cracks and holes in the surface. Ignoring these imperfections can lead to an uneven finish and shorten the lifespan of your paint job. Here's a step-by-step guide on how to fill cracks and holes with suitable materials to ensure a flawless result.
- Identify the Imperfections: Begin by thoroughly inspecting the surface for any cracks, holes, or dents. Mark these areas with a pencil to ensure you don't miss any during the repair process.
- Clean the Area: Before applying any filler, make sure the area is clean and free from dust, dirt, and loose paint. Use a brush or a vacuum to clean out any debris from the cracks or holes.
- Choose the Right Filler: Depending on the size and depth of the imperfection, choose an appropriate filler. For small cracks and holes, a standard acrylic latex caulk works well. For larger holes, consider using a more robust material like epoxy filler or wood filler.
- Apply the Filler: Using a putty knife, apply the filler into the cracks or holes. Press firmly to ensure the filler adheres well and fills the entire void. Smooth out the surface with the putty knife to make it level with the surrounding area.
- Let It Dry: Allow the filler to dry completely. Drying times can vary depending on the material used and the weather conditions. Refer to the manufacturer's instructions for the recommended drying time.
- Check for Shrinkage: Some fillers may shrink as they dry, leaving a slight depression. If this happens, apply a second layer of filler and let it dry.
Sanding for Smoothness
Once the filler is dry, the next crucial step is sanding. Sanding the patched areas ensures a smooth, even surface for priming and painting. Here’s why it’s important and how to do it effectively.
- Select the Right Sandpaper: Start with medium-grit sandpaper (about 120 grit) to smooth out the filled areas. For a finer finish, you can switch to a finer grit (about 220 grit) afterward.
- Sand the Patched Areas: Gently sand the filled areas using circular motions. The goal is to blend the edges of the filler with the surrounding surface. This step is critical to avoid any visible lines or bumps after painting.
- Check for Smoothness: Run your hand over the sanded area to check for smoothness. The surface should feel even and level with the rest of the wall. If you feel any rough spots, continue sanding until they are smooth.
- Clean the Dust: After sanding, clean off the dust using a damp cloth or a vacuum with a brush attachment. Dust can prevent primer and paint from adhering properly, so make sure the surface is completely clean.
Step 3: Choose the Right Primer
Selecting the right primer is crucial for the success of your painting project. The primer you choose will depend on the type of surface you're painting, as well as any specific issues you need to address, such as stains or moisture. Let’s delve into the different types of primers and how to choose the best one for your project.
Types of Primers
Oil-Based Primers
Oil-based primers are great for surfaces that have been previously painted or for raw wood. They provide excellent adhesion and are effective at sealing stains and odors. They are particularly good for blocking tannins from wood that can bleed through the paint.
- Pros: Superior stain blocking, great adhesion on glossy surfaces, and effective for high-traffic areas.
- Cons: Longer drying time, strong odor, and requires mineral spirits for clean-up.
Personal anecdote: I remember a project where we initially chose a water-based primer for a heavily stained ceiling. After a few days, the stains started bleeding through. We switched to an oil-based primer, and the problem was resolved, providing a smooth, clean finish that held up over time.
Water-Based Primers
Water-based (or latex) primers are more versatile and easier to use. They dry quickly, have low odor, and can be cleaned up with soap and water. These primers are suitable for drywall, softwoods, masonry, and galvanized metal.
- Pros: Quick drying, easy clean-up, and low VOCs.
- Cons: Less effective at blocking severe stains and may not adhere well to glossy surfaces.
Stain-Blocking Primers
Stain-blocking primers are specially formulated to cover stains from water damage, smoke, and tannins. They can be either oil-based or water-based, depending on the specific product.
- Pros: Excellent at covering severe stains and providing a uniform surface.
- Cons: Some stain-blockers, especially oil-based ones, can have strong odors and longer drying times.
Primer for Different Surfaces
Wood
For untreated wood, oil-based primers are generally the best option due to their ability to seal the surface and prevent tannin bleed. However, for painted wood or softwoods, a high-quality water-based primer can also work well.Recommendations:
- Kilz Original Oil-Based Primer: Excellent for heavy stains and tannin bleed.
- Zinsser Bulls Eye 1-2-3 Water-Based Primer: Good for general purposes and quick-drying.
- Sherwin Williams - All purpose Primer
Metal
Metal surfaces require primers that can prevent rust and provide a smooth base for the paint. For bare metal, a rust-inhibitive primer is essential.Recommendations:
- Rust-Oleum Clean Metal Primer: Specifically designed to prevent rust and adhere well to metal surfaces.
- Zinsser Cover Stain Oil-Based Primer: Works well on both ferrous and non-ferrous metals.
- Sherwin Williams - DTM
Masonry
Masonry surfaces, such as brick and concrete, benefit from primers that can seal the porous surface and prevent moisture penetration.Recommendations:
- Zinsser Bulls Eye 1-2-3 Primer: Suitable for masonry, offering good adhesion and sealing properties.
- Kilz Premium High-Hide Stain Blocking Latex Primer: Effective on porous surfaces and provides a good base for paint.
- Sherwin Williams - Loxon Primer Sealer
Drywall
For new drywall, a water-based primer-sealer is typically used. It seals the surface and provides a smooth, even base for paint.Recommendations:
- Kilz 2 All-Purpose Primer: Affordable and effective for drywall.
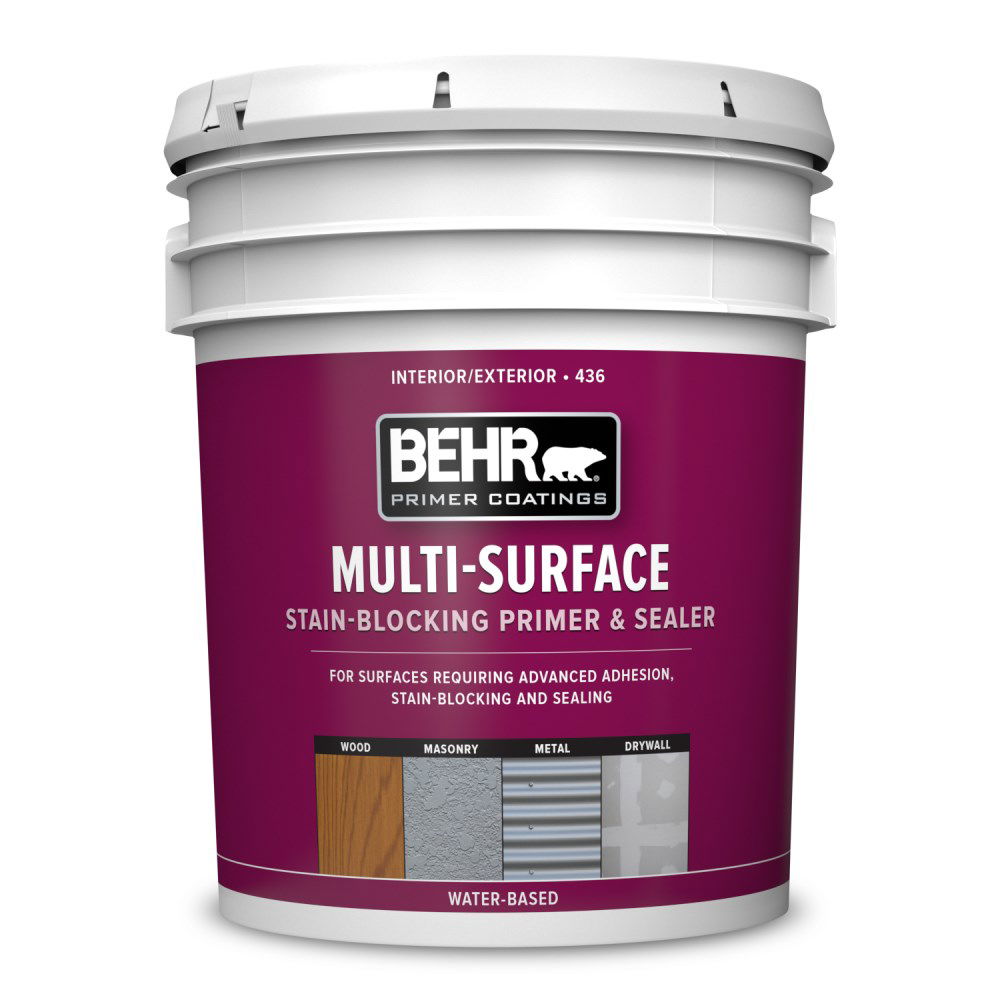
- Behr Premium Plus Drywall Primer and Sealer: Offers good coverage and easy application.
- Sherwin Williams PVA
In Our Experience:
"We've seen how a properly primed exterior can extend the life of a paint job significantly. Our meticulous preparation process, coupled with the right choice of primer, has helped countless homeowners enjoy vibrant, durable finishes that withstand the elements. We pride ourselves on transforming homes with attention to detail from the very first brushstroke of primer."
Step 4: Apply the Primer Correctly
Tools and Equipment
Having the right tools for primer application is essential to achieve a smooth and even base for your paint. Here are the key tools you’ll need:
- Brushes: A high-quality brush is indispensable for cutting in around edges and corners. Brushes are also great for small or detailed areas where rollers can't reach.
- Rollers: Rollers are ideal for covering large, flat surfaces quickly and efficiently. Choose a roller with a nap suited to your surface; shorter naps for smooth surfaces and longer naps for textured surfaces.
- Sprayers: For the best coverage on large surfaces or detailed work, a paint sprayer can be a fantastic tool. Sprayers offer a uniform application and can save a significant amount of time.
- Drop Cloths and Tape: Protecting your work area with drop cloths and using painter's tape to mask off areas you don't want to prime is crucial for a clean job.
Application Techniques
Applying primer correctly ensures the longevity and quality of your paint job. Here are some tips for a flawless application:
- Preparation: Before you start, make sure the surface is clean, dry, and free of any loose paint, dust, or debris. Proper surface preparation can’t be overstated—it’s the foundation of any good paint job.
- Stirring the Primer: Always stir your primer thoroughly before use to ensure the consistency is even. This step helps in achieving a uniform application.
- Cutting In: Start by cutting in around the edges, corners, and trim with a brush. This technique involves painting the areas that a roller cannot reach. It’s a meticulous step but sets up the rest of the application for success.
- Rolling On: Use a roller to apply the primer in sections, working in small, manageable areas. Apply the primer in a "W" or "M" motion to evenly distribute it, then go back over it lightly to smooth out any roller lines.
- Spraying: If using a sprayer, maintain a consistent distance from the surface and move in a steady, overlapping motion to avoid drips and ensure even coverage.
- Thin Coats: Apply primer in thin, even coats. Thick coats can lead to drips, uneven drying, and poor adhesion. It's better to apply multiple thin coats if necessary.
- Drying Time: Allow the primer to dry completely between coats. Refer to the manufacturer’s instructions for drying times, which can vary depending on the type of primer and environmental conditions. Rushing this step can result in a compromised finish.
- Inspection: Once the primer is dry, inspect the surface for any missed spots or imperfections. Sand any rough areas lightly and apply an additional coat of primer if necessary.
Step 5: Allow Proper Drying Time
Importance of Drying Time
One of the most critical steps in the priming process is allowing the primer to dry completely before applying the paint. Skipping this step or rushing through it can compromise the entire paint job, leading to poor adhesion, peeling, and an uneven finish. Proper drying time ensures that the primer has formed a solid base, ready to accept the paint coat effectively.Think of drying time as the crucial interval where the primer settles and cures, bonding with the surface to create a stable layer. When the primer isn't fully dry, the paint won't adhere correctly, leading to issues down the line. I once had a project where impatience got the better of me, and I painted over a not-quite-dry primer. The result? A blotchy finish that started peeling within weeks. Lesson learned: always respect drying times.
Recommended Drying Times
The drying time for primer can vary depending on several factors, including the type of primer, the surface being primed, and the environmental conditions. Here are some general guidelines to help you plan your project effectively:
- Oil-Based Primers: Typically, oil-based primers require more time to dry. On average, you should allow 24 hours for oil-based primers to dry completely. This type of primer is excellent for sealing surfaces and providing a durable base but requires patience due to its longer drying time.
- Water-Based Primers: Also known as latex primers, these generally dry faster than oil-based options. You can expect a drying time of about 3 to 4 hours under optimal conditions. However, it's always best to check the manufacturer's instructions as drying times can vary.
- Stain-Blocking Primers: These are specialized primers designed to cover stains and prevent them from bleeding through the paint. Drying times can range from 2 to 6 hours. Again, refer to the product specifics for the most accurate drying times.
Environmental Conditions
Environmental factors play a significant role in how quickly primer dries. Here are a few considerations to keep in mind:
- Temperature: Ideal temperatures for priming are typically between 50°F and 90°F. Colder temperatures can slow down the drying process, while very high temperatures might cause the primer to dry too quickly, leading to cracking.
- Humidity: High humidity levels can extend drying times, as the moisture in the air slows the evaporation process. On the other hand, very low humidity might cause the primer to dry too fast, affecting its adhesion properties.
- Ventilation: Proper airflow can help the primer dry more evenly and quickly. Ensure that your workspace is well-ventilated to facilitate the drying process.
Practical Tips
- Test the Primer: If you're unsure whether the primer is dry, perform a touch test. Gently press your finger on the surface. If it feels tacky, it's not ready for the paint yet.
- Follow Manufacturer Guidelines: Always adhere to the drying times recommended by the primer manufacturer. They provide these guidelines based on extensive testing and product knowledge.
- Consider the Conditions: Adjust your drying time expectations based on the current weather and environmental conditions. If it's particularly humid or cold, add extra time to your schedule.
Step 6: Inspect the Primed Surface
Look for Imperfections
Once the primer has completely dried, it’s crucial to inspect the primed surface meticulously. This step ensures that the priming process has adequately prepared the surface for the final coat of paint. Here’s how you can do it effectively:
Steps to Inspect the Primed Surface
- Good Lighting: Make sure you have adequate lighting to spot any imperfections. Natural light is best, but if that's not available, use bright, white lights.
- Close Examination: Get up close to the surface and look for any visible issues. Move slowly and methodically across the area to ensure nothing is missed.
- Use Your Hands: Run your hands gently over the surface to feel for any rough spots, bumps, or uneven areas that may not be immediately visible.
- Mark Imperfections: Use a pencil or a piece of tape to mark any spots that require attention. This way, you won't miss any areas during the touch-up process.
I remember a project where I skipped this inspection step, assuming the primer had covered everything perfectly. When the paint went on, some minor flaws became glaringly obvious, and I had to backtrack to fix them, delaying the entire project. Now, I never skip this thorough inspection.
Touch-Up and Reapply if Necessary
Even with the best preparation and application techniques, there may be areas that need a little extra attention. Here’s how to handle these spots:
How to Handle Areas That Need Additional Priming or Touch-Ups
- Identify Problem Areas: Refer back to the marks you made during your inspection. Focus on these areas to determine the extent of the touch-up required.
- Light Sanding: For minor imperfections, lightly sand the area to smooth out any bumps or rough patches. Use fine-grit sandpaper to avoid damaging the surrounding primer.
- Clean the Surface: After sanding, clean the area with a damp cloth to remove any dust or debris. This ensures the primer will adhere properly when you reapply it.
- Reapply Primer: Apply a thin, even coat of primer to the marked areas. Use a brush for small spots or a roller for larger sections. Allow this touch-up primer to dry completely before proceeding.
- Reinspect: Once the touch-up primer has dried, reinspect the entire surface again to ensure that all imperfections have been addressed. It might seem repetitive, but this step ensures a flawless finish.
Practical Tips for Success
- Multiple Inspections: Don't hesitate to inspect the surface multiple times. Fresh eyes can often catch what you missed initially.
- Patience is Key: Allowing the primer to dry fully before inspecting and touching up can make a significant difference in the final outcome. Rushing this step can lead to repeated work and frustration.
- Quality Tools: Use high-quality brushes and rollers for touch-ups to ensure a smooth application that blends seamlessly with the initial primer coat.
Step 7: Prepare for Painting
Final Preparations
Ensuring your surface is perfectly prepped before you even dip your brush into the paint can make all the difference between a smooth, long-lasting finish and a patchy, problematic one. Here's how to make sure everything is ready for the big job ahead.
Ensuring the Surface is Ready for Paint
- Masking and Protecting: This step is crucial to avoid any unintentional paint splatters on areas that aren't supposed to be painted. Use high-quality painter's tape to mask off edges, windows, and trim. Cover outdoor furniture, plants, and walkways with drop cloths or plastic sheeting to protect them from paint drips and overspray. Personally, I once skipped covering a nearby rose bush, thinking I’d be careful enough. Let’s just say, my client wasn’t thrilled about the unintended green accents on her flowers.
- Final Surface Check: Go over the primed surface one last time. Check for dust, debris, or any missed spots that might need a touch-up. A clean, well-prepped surface is your best ally in achieving a professional finish. This is a lesson I learned early in my career: any dust or dirt left on the surface will mix with your paint and create a rough texture.
- Weather Conditions: Make sure the weather is conducive for painting. Avoid extremely hot or cold days, and check the forecast to ensure you won’t be interrupted by rain. Optimal weather conditions help the paint to dry evenly and adhere better.
Choosing the Right Paint
Selecting the right paint is as crucial as the preparation work. It can be tempting to save a few bucks by opting for cheaper paint, but investing in high-quality paint will pay off in the long run with better coverage, durability, and overall finish.
Recommendations for Selecting High-Quality Exterior Paint
- High-Quality Paints: Go for reputable brands known for their durability and finish. These paints are formulated to withstand harsh weather conditions, which is essential for exterior surfaces. Products like Sherwin-Williams Duration, Benjamin Moore Aura, and Behr Marquee are excellent choices that offer superior coverage and durability.
- Finish Matters: Choose the right finish based on the surface and the look you want to achieve. Flat or matte finishes are great for hiding imperfections on older homes. Satin or eggshell finishes offer a bit more durability and are easier to clean, making them ideal for busy areas. For trim and doors, semi-gloss or gloss finishes are perfect as they stand up well to wear and tear and are easier to wipe clean.
- Color Selection: While color choice is often about personal preference, it’s worth considering colors that enhance your home’s architectural style and appeal to potential future buyers. Light, neutral colors tend to make spaces look larger and more inviting. If you’re unsure, Lightmen Painting can provide color consultation services to help you choose the perfect hue.
- Check the Paint’s Properties: Look for paints with UV protection to prevent fading, and those that are mildew and mold resistant, especially if you live in a humid climate. The right properties will extend the life of your paint job and maintain the beauty of your home for years to come.
- Primer Compatibility: Ensure that the paint you choose is compatible with the primer you used. This ensures better adhesion and finish. Most high-quality paints will specify which primers they work best with, so check the labels or ask a professional for advice.
Practical Tips for Success
- Sample First: Always test a small area with your chosen paint before committing to the whole project. This lets you see how the color looks in different lighting and ensures it’s the right choice.
- Quality Tools: Using good-quality brushes and rollers can make a significant difference in the final finish. Cheap tools can leave streaks and brush marks, whereas high-quality tools provide a smooth, even application.
- Multiple Coats: Don’t rush through the job. Applying multiple thin coats will give you a better finish than one thick coat. Allow each coat to dry fully before applying the next.
Lightmen Painting's Expertise in Exterior Painting
When it comes to exterior painting, Lightmen Painting stands out for its commitment to quality and meticulous attention to detail. Over the years, we've honed our process to ensure every project not only looks stunning but also lasts for years to come. Here's a closer look at our proven process and some testimonials from our satisfied clients.
Our Proven Process
We believe that a successful exterior paint job starts long before the paint touches the surface. Our comprehensive exterior painting process is designed to ensure the best possible results.
Detailed Inspection and Cleaning
Every project begins with a thorough inspection to identify any issues that need addressing. We look for cracks, peeling paint, and other imperfections that could affect the final result. This step is crucial, as it helps us plan the best approach to preparing the surface.Cleaning is the next critical step. We use pressure washing to remove dirt, mildew, and loose paint. This ensures the primer and paint adhere properly to the surface. I recall a project where a client was skeptical about the need for pressure washing, but they were amazed at the difference it made in the final look and longevity of their paint job.
Repair and Patch
We take the time to repair and patch any damage. This includes filling cracks and holes with high-quality materials and sanding the patched areas to create a smooth, even surface. Skipping this step can lead to visible imperfections and shorter paint life.
Choosing the Right Primer
Selecting the right primer is crucial. Different surfaces require different types of primers. For example, oil-based primers are excellent for wood, while water-based primers are better for masonry. We also use stain-blocking primers for areas prone to staining. I learned the hard way early in my career that the wrong primer can lead to peeling and poor adhesion.
Applying the Primer
Using the right tools and techniques for primer application is essential. We use high-quality brushes, rollers, and sprayers to ensure even coverage. The primer must be applied correctly to create a solid base for the paint.
Allowing Proper Drying Time
Patience is key here. Rushing this step can compromise the entire project. We follow manufacturer guidelines for drying times and consider weather conditions to ensure the primer is fully dry before painting.
Inspecting the Primed Surface
Before moving on to painting, we thoroughly inspect the primed surface for any imperfections. This step allows us to touch up and reapply primer if necessary, ensuring a flawless finish.
Final Preparations and Painting
The final step before painting is to mask and protect areas that won’t be painted. We then apply high-quality exterior paint using the best techniques to achieve a smooth, even finish. Our choice of paint is based on durability, weather resistance, and client preference.
Do You Have Questions? Give Us A Call With Any & All! 503-389-5758
-
People Also Ask:
Why is priming necessary before painting the exterior of a house?
Priming is crucial for several reasons: it enhances paint adhesion, ensuring the paint sticks better and lasts longer; it seals the surface to prevent moisture damage; and it provides a uniform base, which is essential for achieving a consistent paint finish.
What are the best practices for applying primer on exterior surfaces?
Best practices include thoroughly cleaning the surface before priming, using high-quality brushes or rollers for application, applying thin, even coats, and allowing proper drying time between coats. It's also important to choose the right type of primer for the surface material and environmental conditions.
How do I choose the right primer for my exterior painting project?
Select a primer based on the type of surface you are painting and the specific issues you need to address, such as moisture, stains, or old paint. Oil-based primers are ideal for wood and for blocking stains, while water-based primers are suitable for drywall and non-stained surfaces.
-
SUBSCRIBE TO OUR BLOG: Stay informed with the latest in Painting and DIY projects by subscribing to Lightmen Painting. Get insights, tips, and more delivered straight to your inbox. We would also love to know what you would like to read about, leave thoughts on where we should go next. Interests, Topics, Ideas, all are welcome.

If your in the Portland, Or. area and need advice or a free no obligation estimate call us at 503-389-5758 or email scheduling@lightmenpainting.com
Thanks for stopping by Lightmen Daily! Stay tuned for more practical tips and expert advice on making your painting projects flawless, from wall to floor!
Definitions
- Priming: The process of applying a primer paint, which prepares surfaces for painting by improving paint adhesion and durability.
- Adhesion: The ability of paint or primer to stick effectively to the surface without flaking or peeling.
- Durability: The capacity of the paint or primer to withstand environmental elements and wear over time.
- Surface Preparation: The actions taken to clean, repair, and prepare surfaces before painting or priming to ensure the best possible outcome.
- Moisture Sealing: The capability of primer to prevent moisture penetration, important for exterior surfaces exposed to weather.
- Uniform Finish: Achieving a consistent and even appearance in the painted surface, free from patches or imperfections.
- Oil-Based Primer: A type of primer used for its strong adhesion properties and ability to seal stains; ideal for wood and exterior surfaces.
- Water-Based Primer: Also known as latex primer, known for its quick drying time and ease of clean-up, suitable for indoor use and non-stained surfaces.
- Stain Blocking: A property of primers that prevents previous stains or colors from bleeding through the new paint.
- Drying Time: The required time for primer or paint to dry and set before the next coat can be applied or before the finished coat is exposed to use.
Lightmen Painting Serving: Portland, Tigard, Lake Oswego, Tualatin, West Linn, Milwaukie, Sherwood, Happy Valley, Oregon City, Beaverton, Hillsboro, Gresham