How to Achieve a Smooth Finish on Cabinets
Key Highlights:
- Essential tools and materials are critical for effective wallpaper removal, including scoring tools, scrapers, and steamers.
- Proper preparation, including protecting floors and outlets, is key to preventing damage during wallpaper removal.
- Applying the right removal solution and carefully scraping the wallpaper helps avoid wall damage and makes the process smoother.
- Consider using removable wallpaper or hiring professionals like Lightmen Painting to avoid future removal difficulties.
Importance of a Smooth Finish on Cabinets
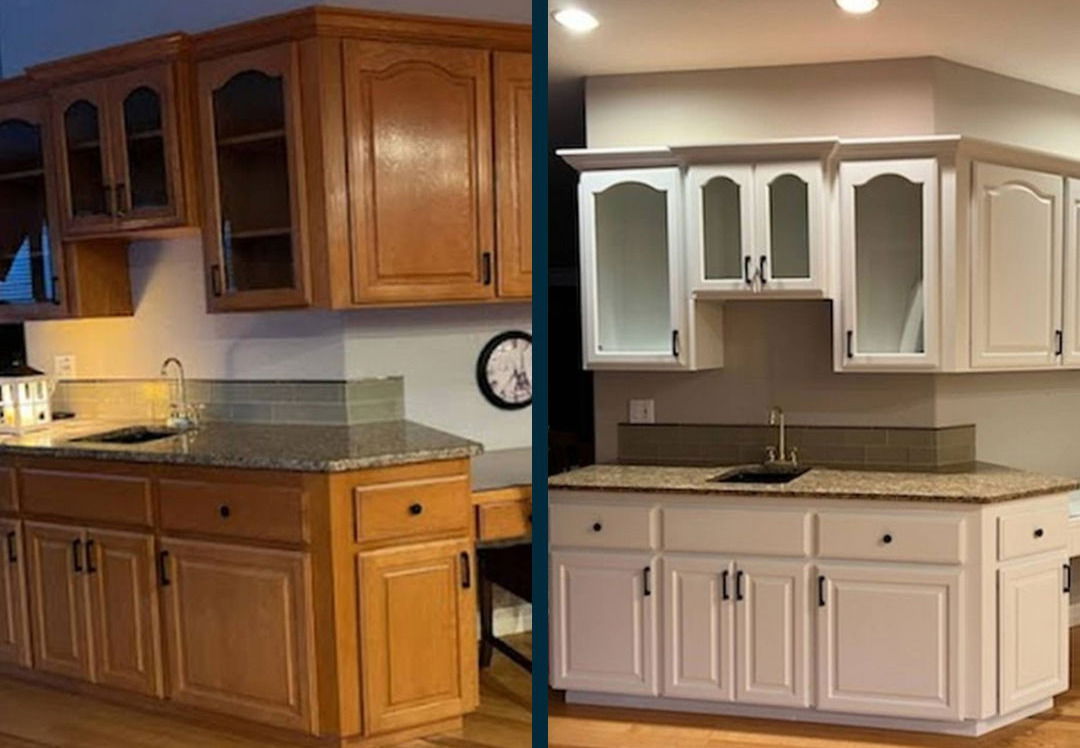
When it comes to cabinetry, one of the most overlooked aspects is the finish. We often get caught up in the design, color, and placement, but the truth is, the finish is what ties it all together. It’s like the frosting on a cake—sure, the cake might be delicious, but it’s that smooth, silky frosting that makes you want to dive right in. A smooth finish on cabinets not only enhances their appearance but also significantly boosts their durability. Whether you're dealing with new cabinets or refinishing old ones, achieving that perfect finish can make all the difference.
Understanding the Basics of Cabinet Finishing
What Makes a Smooth Finish Essential?
When we talk about the importance of a smooth finish on cabinets, it’s not just about aesthetics—though that’s certainly a big part of it. A smooth finish enhances the natural beauty of the wood grain, giving it depth and character that a rough or uneven finish simply can’t match. Imagine running your hand over a cabinet door and feeling nothing but a silky, even surface. That’s the goal.
From a practical standpoint, a smooth finish also makes cabinets much easier to clean. Kitchens can be messy places, and grease, grime, and food particles have a way of finding their way onto every surface. A smooth finish doesn’t give these substances anything to cling to, making your cleaning routine faster and more effective. You can wipe down your cabinets with a damp cloth, and they’ll look as good as new.
But the benefits don’t stop there. A smooth finish also contributes to the longevity of your cabinets. By sealing the wood thoroughly, it protects against moisture, spills, and daily wear and tear. This means your cabinets won’t just look good—they’ll last longer too. It’s an investment in the longevity of your kitchen, and trust me, it’s one that pays off. Over the years, I’ve seen countless cabinets that have withstood the test of time simply because they had a well-applied, smooth finish.
Choosing the Right Materials
Achieving that perfect smooth finish starts with selecting the right materials. This is where the magic happens—or where it can go terribly wrong. I’ve seen people try to cut corners with cheap paints and primers, only to end up with a finish that looks blotchy, uneven, and worse than before they started. At Lightmen Painting, we never compromise on materials because we know that the right products are key to a beautiful, lasting finish.
When it comes to choosing paint, the first decision is whether to go with oil-based or water-based products. Oil-based paints have been a go-to for cabinet finishing for years, and for good reason. They provide a hard, durable finish that’s perfect for high-traffic areas like kitchens. They also tend to level out nicely, which is crucial for that smooth, glass-like finish. However, oil-based paints take longer to dry and have a stronger odor, which can be a drawback if you’re working in a tight space.
On the other hand, water-based paints have come a long way in recent years. They dry faster, have less odor, and clean up easily with soap and water. Plus, many of the high-quality water-based paints on the market today offer excellent durability and a smooth finish that rivals their oil-based counterparts. When we’re working on a cabinet refinishing project at Lightmen Painting, we carefully consider the needs of the space before selecting our materials. For instance, in a busy household where quick turnaround and low odor are important, we might lean towards a high-quality water-based paint.
But paint is only part of the equation. The primer you choose is just as important. A good primer seals the wood and provides a smooth, even base for the paint to adhere to. It can also block any stains or tannins from bleeding through, which is crucial when you’re working with wood like oak or mahogany. For the best results, we recommend using a bonding primer, especially if you’re painting over an existing finish. This ensures that the new paint adheres properly and gives you that smooth, professional-grade finish you’re after.
Things to Know
- Material Quality is Key: The quality of paint and primer significantly impacts the finish and durability of your cabinets.
- Proper Prep Matters: Thorough cleaning, sanding, and priming are crucial steps that cannot be skipped if you want a flawless finish.
- Consider Professional Help: For best results, especially with challenging projects, professional painters offer the expertise necessary to achieve a perfect finish.
Steps to Achieving a Smooth Finish on Cabinets
Creating a smooth, professional finish on cabinets might seem like a daunting task, but with the right approach, it’s entirely achievable. Trust me, after years of refinishing cabinets, I’ve seen firsthand how attention to detail can transform a set of old, tired cabinets into the crown jewel of a kitchen. The key is in following a precise process, where each step builds on the previous one to create that flawless finish. Let's dive into the essential steps to ensure your cabinets look as good as new, every time.
Proper Surface Preparation
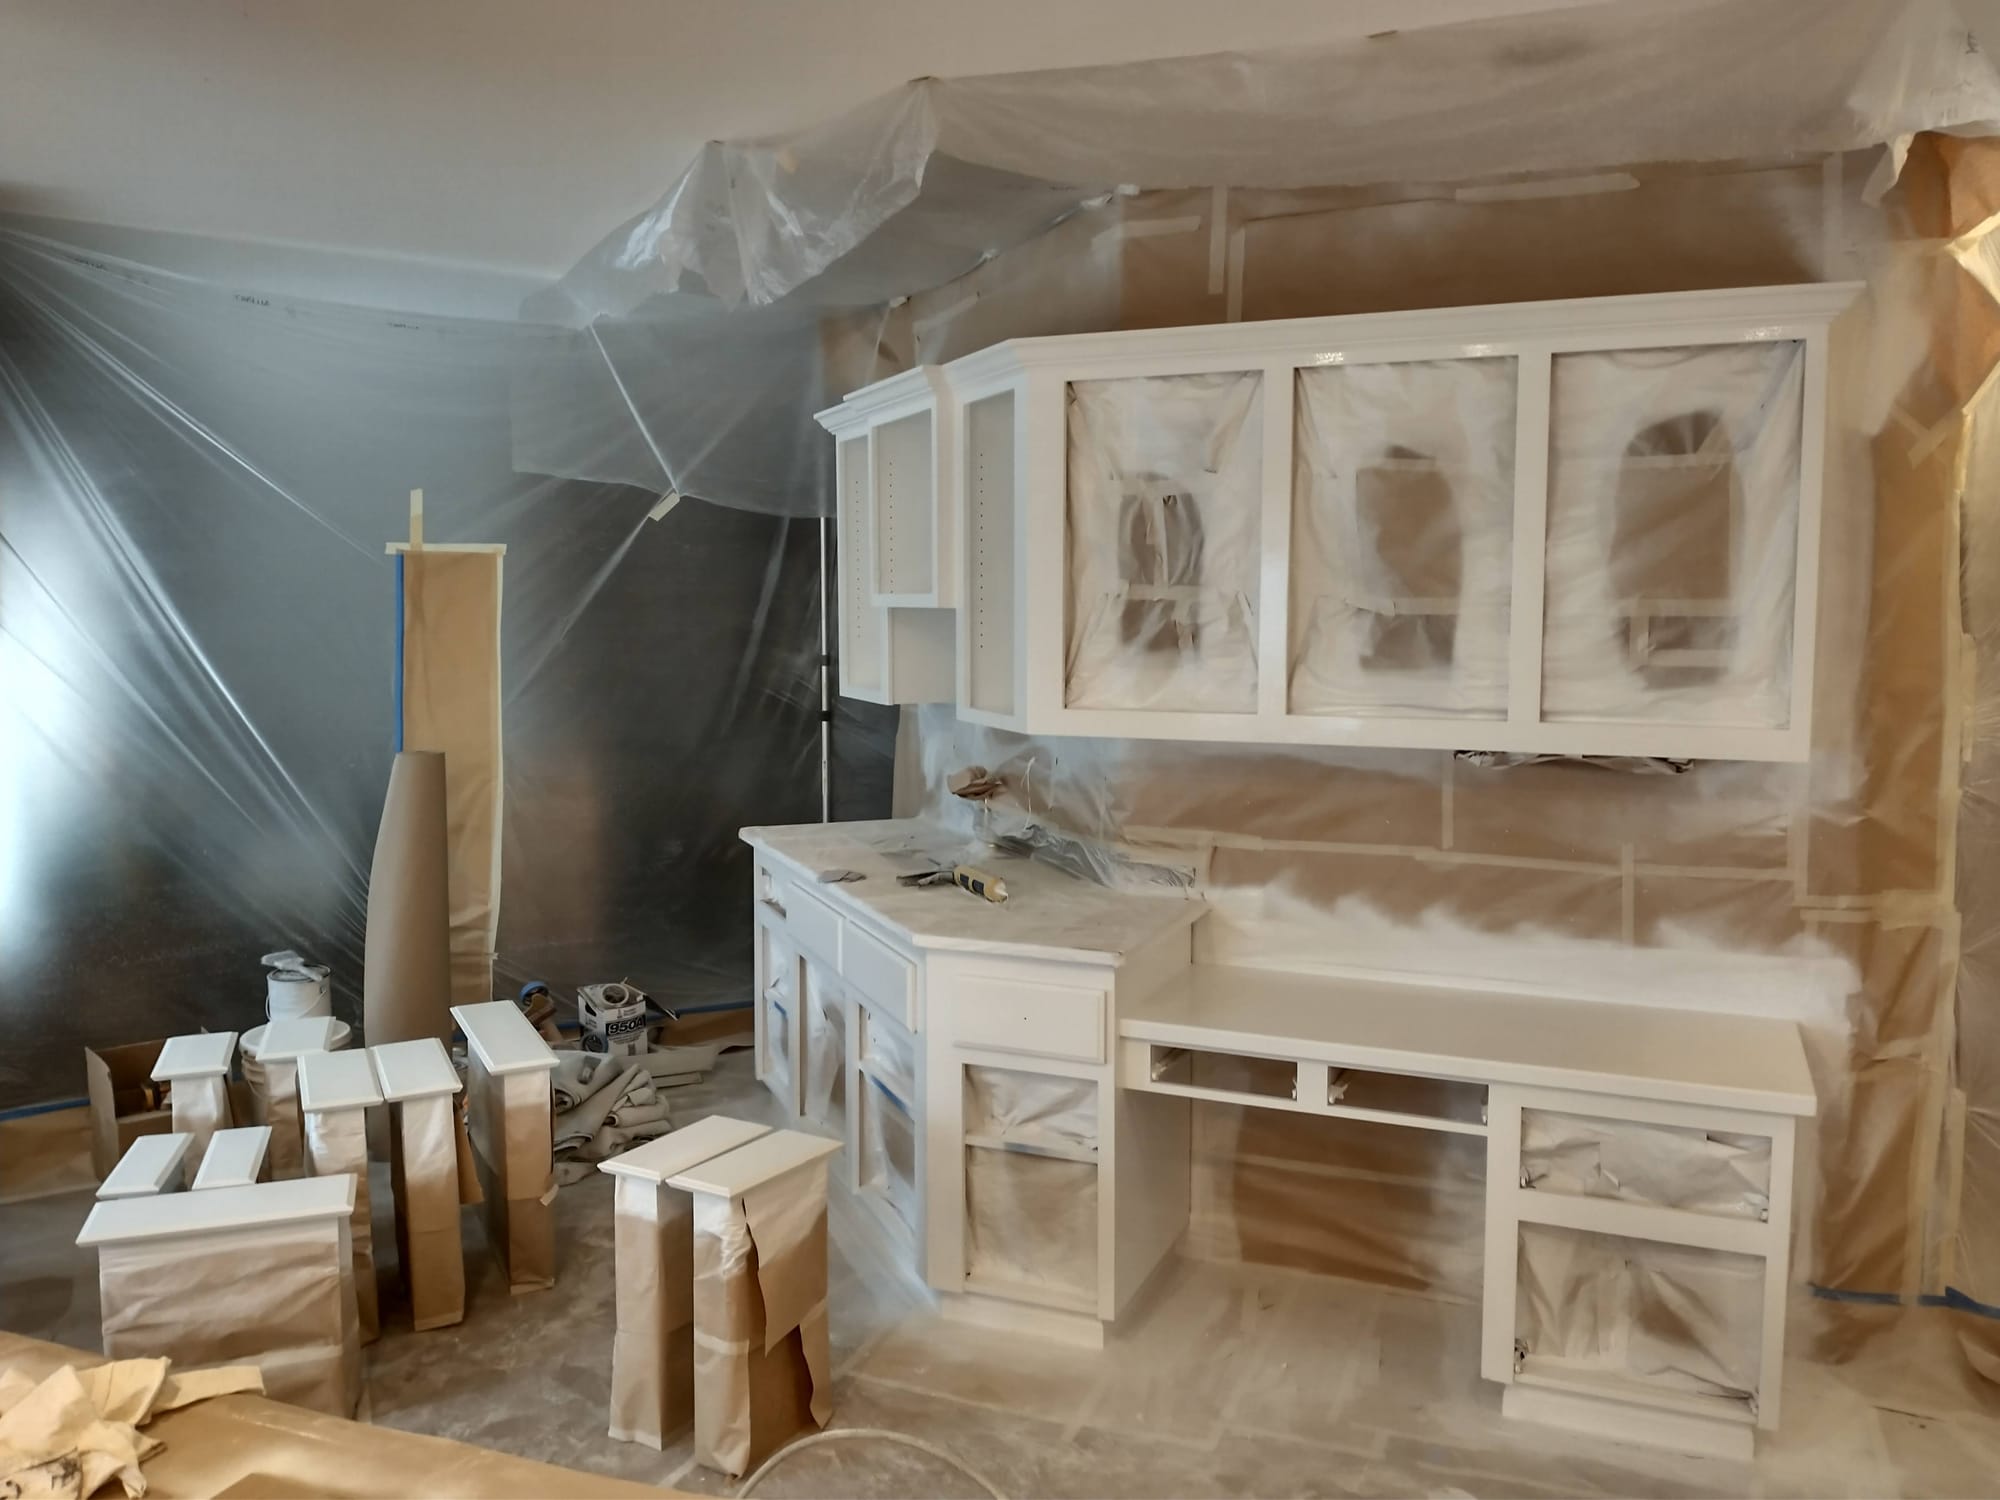
Before you even think about cracking open that can of paint, you need to start with proper surface preparation. This is where the magic begins—or, if you skip it, where the disaster starts. I’ve seen so many DIYers rush through this step only to end up with a finish that peels, bubbles, or shows every imperfection. The truth is, if you don’t take the time to prepare the surface correctly, no amount of paint or skill will save you later.
Start by thoroughly cleaning the cabinets to remove any grease, grime, or dust. Kitchens are notorious for these, and painting over them is a surefire way to ruin your finish. Use a degreaser or a mild detergent to scrub everything down, and don’t be afraid to get into all the nooks and crannies.
Next, you’ll want to sand the cabinets. This step is crucial for two reasons: it removes any old paint or varnish, and it roughens up the surface just enough to give your primer something to grip onto. I usually start with a medium grit sandpaper, around 120-150 grit, to remove the old finish. After that, I’ll switch to a finer grit, like 220, to smooth everything out. Remember, the smoother the surface at this stage, the smoother your finish will be.
If you’re dealing with imperfections like dings, scratches, or gouges, now is the time to fill them. Use a wood filler that’s compatible with your paint type, and make sure to sand it smooth once it’s dry. Any bumps or ridges will show through the final finish, so take your time here.
Once the sanding is complete, wipe down the cabinets with a tack cloth to remove all the dust. This is another step that’s easy to overlook but critical for achieving a smooth finish. Dust particles can create bumps and imperfections in your paint, so be thorough.
Finally, apply a high-quality primer. The primer is your base layer, and it needs to be smooth and even. Not only does it help the paint adhere better, but it also seals the wood and blocks any stains or tannins from bleeding through. I recommend using a bonding primer, especially if you’re working with a challenging surface. Lightmen Painting always uses the best primers available because we know they set the stage for a flawless finish.
Applying the Paint
Once your surface is prepped and primed, it’s time to apply the paint. But don’t just slap it on and hope for the best—there’s a technique to getting that perfect, smooth finish. I always recommend applying multiple thin coats rather than one thick coat. A thick coat might seem like it will save time, but it’s more likely to drip, run, or create an uneven finish.
When it comes to tools, your choice will depend on the look you’re going for and your level of comfort. Brushes are great for getting into tight spaces and for a more traditional look, but they can leave brush marks if you’re not careful. Rollers are faster and can cover larger areas more evenly, but they’re tricky on smaller, detailed sections. Sprayers, on the other hand, provide the smoothest finish, but they require some practice to use effectively.
No matter which tool you choose, keep your hand steady and work in long, even strokes. Always work in the direction of the wood grain, and avoid going back over areas you’ve just painted—this can cause streaks and bubbles.
Common mistakes to watch out for include overloading your brush or roller, which can lead to drips, and not paying attention to the edges, which can result in paint pooling in corners. If you do notice a drip or a streak, resist the urge to fix it right away. Wait for the paint to dry, then sand it out and apply another coat.
Sanding Between Coats
Here’s a step that separates the pros from the amateurs: sanding between coats. It might seem like extra work, but trust me, it’s worth it. Lightly sanding between each coat of paint ensures that your finish is smooth and free of imperfections. You don’t need to sand aggressively—just a quick pass with fine-grit sandpaper, around 320-400 grit, will do the trick.
The goal here is to knock down any minor imperfections, like dust particles or bubbles, that may have settled in the paint. It also helps the next coat of paint adhere better, creating a smoother finish. Be gentle—over-sanding can remove too much paint and ruin your smooth surface.
At Lightmen Painting, we take this step seriously because it’s one of the secrets to achieving that flawless, factory-like finish that our clients love. We carefully inspect each layer for imperfections, sand as needed, and only move on to the next coat once we’re satisfied that the surface is perfect.
Finishing Touches with a Topcoat
After all the careful preparation and painting, the final step is to apply a topcoat. This is the layer that seals everything in and provides that last bit of smoothness and protection. A topcoat isn’t just about looks—it’s about durability. It protects your paint job from scratches, stains, and the wear and tear of daily use.
When choosing a topcoat, you have a few options. Polyurethane is a popular choice for its durability and water resistance, making it ideal for kitchen cabinets. However, it can yellow over time, especially on lighter colors. Polycrylic is another great option—it’s water-based, dries clear, and doesn’t yellow. It’s a bit less durable than polyurethane, but it’s still an excellent choice for cabinets.
Apply the topcoat with the same care as your paint. Use a clean, high-quality brush, and apply it in thin, even layers. Watch out for bubbles, which can form if you shake the can or apply the topcoat too quickly. And as always, work in the direction of the wood grain.One final tip: make sure your topcoat is fully dry before using the cabinets. It can be tempting to start loading them up right away, but giving the topcoat time to cure will ensure a harder, more durable finish.
Tools and Techniques for a Professional Finish
When it comes to achieving a flawless, professional finish on cabinets, the tools and techniques you use are just as important as the paint itself. Over the years, I’ve learned that investing in the right equipment and mastering a few advanced techniques can make all the difference between a good finish and a great one. So, if you're aiming for that showroom-quality look, here's a deep dive into the tools and methods that will get you there.
Selecting the Right Tools
Let’s start with the basics: the tools of the trade. If you’ve ever tried painting cabinets with a bargain-bin brush, you’ve probably learned the hard way that not all tools are created equal. A high-quality finish starts with high-quality tools. It might be tempting to save a few bucks by using whatever brushes and rollers you have lying around, but trust me, this is not the place to cut corners.
Brushes: When it comes to brushes, you want to go for high-quality, synthetic bristles. They’re ideal for water-based paints and offer the smoothest finish without leaving behind those pesky brush marks. Look for brushes labeled as “trim” or “finish” brushes—they’re designed for precise work and will help you achieve a crisp, clean edge on your cabinets. At Lightmen Painting, we swear by professional-grade brushes because they hold more paint and distribute it evenly, which is key to avoiding streaks.
Rollers: If you’re covering a larger area, a good roller is your best friend. But not just any roller—opt for a high-density foam roller. These are perfect for cabinets because they don’t leave a texture behind like some fabric rollers do. They’re also great for getting into those tight corners without creating lap marks. A smooth finish is all about consistency, and the right roller will help you maintain that from start to finish.
Sprayers: For those who want to go the extra mile, a paint sprayer is the ultimate tool for a professional finish. It’s what we often use at Lightmen Painting when we’re aiming for that factory-perfect look. Sprayers provide the most even coverage and can get into all the nooks and crannies that brushes and rollers can’t reach. However, they do require some practice to use effectively, and setup and cleanup can be more time-consuming. But if you’re after that glass-like finish with no visible brush or roller marks, a sprayer is worth considering.
Investing in these high-quality tools might seem like a big upfront cost, but the results speak for themselves. A cheap brush might save you a few dollars, but it can also cost you hours of frustration and a subpar finish. At Lightmen Painting, we believe in using the best tools available because we know they make a significant difference in the final result. And when you’re working on something as important as your kitchen cabinets, it’s worth every penny.
Advanced Techniques for a Smoother Finish
Once you’ve selected the right tools, it’s time to talk techniques. This is where the pros really separate themselves from the amateurs. One of the advanced methods we often use to achieve an ultra-smooth finish is wet sanding and polishing. This technique might sound intimidating, but it’s actually quite straightforward—and the results are nothing short of amazing.
Wet Sanding: After you’ve applied your final coat of paint and it’s had time to dry completely, you might notice that the finish isn’t as smooth as you’d like. Maybe there are a few dust particles or a slight orange peel texture. That’s where wet sanding comes in. Using a fine-grit sandpaper—anywhere from 600 to 2000 grit—gently sand the surface while keeping it wet. The water acts as a lubricant, preventing the sandpaper from clogging and reducing the risk of scratching the surface. It’s a delicate process, but with a little patience, you can achieve an incredibly smooth finish.
Polishing: Once you’ve wet sanded the surface to your satisfaction, the next step is polishing. Polishing will bring back the shine that wet sanding might have dulled. Use a fine polishing compound and a soft cloth or a polishing pad attached to a drill. Gently buff the surface in circular motions until you achieve a high-gloss finish. This step really elevates the final look, making your cabinets gleam with a polished, professional appearance.
At Lightmen Painting, we reserve these advanced techniques for projects where only the best will do. While they’re not always necessary for every job, they’re invaluable when you’re aiming for that top-tier finish. Whether you’re working on a high-end kitchen or a small bathroom vanity, wet sanding and polishing can take your cabinets from good to extraordinary.
When to Use These Techniques: So, when should you consider wet sanding and polishing? These techniques are particularly useful for high-gloss finishes, where every imperfection is magnified. They’re also great for surfaces that will see a lot of use, like kitchen cabinets, where durability and appearance are equally important. However, if you’re working with a matte or eggshell finish, these steps might not be necessary, as those finishes are more forgiving.
In Our Experience:
"We've found that achieving a smooth finish on cabinets is not just about applying paint. It involves meticulous preparation, selecting the right materials, and employing professional techniques. This approach has consistently allowed us to deliver superior results that not only look great but last longer."
Common Challenges and How to Overcome Them
Refinishing cabinets can be one of the most rewarding home improvement projects, but it’s not without its challenges. As someone who’s been in the trenches, I can tell you that achieving that perfect, smooth finish is both an art and a science. Whether you’re tackling this project yourself or thinking about hiring professionals, it’s important to know what obstacles you might encounter and how to overcome them. Let’s dive into some of the most common challenges and the strategies that Lightmen Painting uses to ensure every job turns out flawless.
Dealing with Imperfections
No matter how careful you are, imperfections can and will happen. Dust particles, drips, and uneven paint are just a few of the gremlins that can mar an otherwise perfect finish. The good news is that with a little know-how, these issues can be easily corrected, ensuring that your cabinets end up looking as smooth as silk.
Dust Particles: Dust is the enemy of a smooth finish. It’s sneaky and can settle on your cabinets even after you’ve meticulously cleaned the workspace. One of the best ways to combat this is by using a tack cloth before applying each coat of paint. A tack cloth is a sticky, lint-free cloth that picks up dust and debris without leaving residue behind. It’s a simple but effective tool that can make a huge difference in the final outcome.However, if you do find dust particles in your dried paint, don’t panic. Lightly sanding the affected area with fine-grit sandpaper (about 320-400 grit) can smooth out the surface. Just make sure to wipe down the area again with a tack cloth before applying the next coat.
Drips: Drips are another common issue, especially if you’ve applied the paint too thickly. The best way to avoid drips is by applying multiple thin coats rather than one thick one. But if you do end up with a drip, let it dry completely before attempting to fix it. Trying to smooth out a wet drip usually just makes it worse.Once the drip is dry, sand it down carefully until it’s level with the surrounding paint. Then, reapply a thin coat of paint over the area. At Lightmen Painting, we always check for drips between coats, ensuring that the final finish is as smooth as possible.
Uneven Paint: Uneven paint can occur if you don’t maintain a consistent application technique or if the paint dries too quickly in certain spots. To prevent this, always work in long, even strokes and try to keep a wet edge as you move across the surface. If you do notice uneven areas after the paint has dried, light sanding can often help to even things out before you apply the next coat.These imperfections are all part of the process, especially if you’re new to cabinet refinishing. The key is to be patient and methodical. Remember, it’s easier to correct a mistake before the final coat is applied, so take your time and address issues as they arise. At Lightmen Painting, we’ve honed our techniques over countless projects, which allows us to tackle these challenges efficiently and effectively.
Tips for DIY vs. Professional Application
Deciding whether to tackle a cabinet refinishing project yourself or to hire professionals can be a tough call. On the one hand, there’s a certain satisfaction in doing it yourself, not to mention the potential cost savings. On the other hand, refinishing cabinets is a skill that requires practice, and sometimes, the best way to get the results you want is to call in the experts.
When to DIY: If your cabinets are relatively small, straightforward, and you have some experience with painting, a DIY approach might be just what you need. With the right tools, materials, and a little patience, you can achieve a beautiful finish on your own. Just be prepared for the time and effort required—this isn’t a quick weekend project. You’ll need to commit to the prep work, multiple coats of paint, and the drying time in between.
When to Hire Professionals: If your cabinets are large, intricate, or if you’re simply not confident in your ability to achieve a smooth finish, hiring professionals might be the better choice. Professionals like Lightmen Painting bring years of experience to the table, along with access to high-end tools and materials. We know how to avoid the common pitfalls of cabinet refinishing, and we have the expertise to deal with any unexpected issues that arise.
Another benefit of hiring professionals is the time savings. A project that might take you several weekends to complete can often be done in a fraction of the time by a professional team. Plus, you’ll have the peace of mind that comes with knowing the job will be done right the first time.
We pride ourselves on delivering top-notch results that exceed our clients’ expectations. We understand the importance of a smooth, durable finish, and we have the skills and experience to ensure your cabinets look their absolute best.
Conclusion
Achieving a smooth finish on your cabinets is more than just a cosmetic upgrade—it’s an investment in the longevity and beauty of your kitchen or bathroom. Whether you choose to tackle the project yourself or hire professionals, understanding the common challenges and how to overcome them is key to getting the results you want.
Remember, preparation is everything. Taking the time to properly sand, clean, and prime your cabinets will set the stage for a flawless finish. And if you do encounter issues like dust particles, drips, or uneven paint, don’t get discouraged—these are all part of the process and can be easily corrected with the right techniques.
If you’re feeling confident and ready to take on the challenge, go for it! But if you’d rather leave it to the experts, Lightmen Painting is here to help. Our team has the experience, tools, and know-how to turn your cabinets into a work of art. So why not give us a call? We’d be happy to provide expert advice or schedule a consultation to discuss your project.
Do You Have Questions? Give Us A Call With Any & All! 503-389-5758
-
People Also Ask:
What are the benefits of a smooth finish on cabinets?
A smooth finish on cabinets enhances their aesthetic appeal, makes them easier to clean, and contributes significantly to their durability. It ensures that the cabinets can withstand the rigors of daily use and environmental factors like moisture and heat, especially in high-activity areas like kitchens.
How do you achieve a smooth finish when painting cabinets?
Achieving a smooth finish involves meticulous surface preparation, including thorough cleaning and sanding. Use high-quality primers and paint, apply multiple thin layers rather than a single thick one, and consider techniques such as wet sanding between coats to remove imperfections and ensure an even surface.
Why should you consider hiring a professional for cabinet painting?
Professional cabinet painters have the experience, tools, and techniques to achieve a flawless finish. They understand how to properly prepare the surface, select the right materials, and execute the painting process to ensure durability and a superior aesthetic. Hiring a professional can save time and guarantee a high-quality finish that might be challenging to achieve through DIY methods.
-

If your in the Portland, Or. area and need advice or a free no obligation estimate call us at 503-389-5758 or email scheduling@lightmenpainting.com
Thanks for stopping by Lightmen Daily! Stay tuned for more practical tips and expert advice on making your painting projects flawless, from wall to floor!
Definitions
- Cabinet Finishing: The process of applying paint or stain and other finishing touches to cabinetry to enhance its appearance and durability.
- Smooth Finish: A finish on cabinets that is free from imperfections; it is even and flat, providing a sleek and modern look.
- Primer: A preparatory coating placed on materials before painting to ensure better adhesion of paint to the surface, increased durability, and additional protection for the material being painted.
- Wet Sanding: A technique used between coats of paint to achieve an ultra-smooth finish by sanding the surface with a fine-grit sandpaper and water.
- High-Durability Paints: Paints that are formulated to withstand frequent cleaning and exposure to harsh conditions, making them ideal for areas like kitchens and bathrooms.
- Degreaser: A cleaning product used to remove grease and grime from surfaces, essential in the preparation phase of painting cabinets.
- Polyurethane: A type of varnish used as a topcoat over painted surfaces to protect against scratches, moisture, and other environmental exposures.
- Bonding Primer: A primer used to create a sticky surface for paint to adhere better, especially important when painting over a previously finished surface.
- VOC (Volatile Organic Compounds): These are chemicals found in many paints that can evaporate into the air and cause air quality issues; low-VOC paints are recommended for indoor projects to ensure safety and comfort.
- Tack Cloth: A sticky cloth used to remove dust and small particles from a surface before painting to prevent imperfections.
Lightmen Painting Serving: Portland, Tigard, Lake Oswego, Tualatin, West Linn, Milwaukie, Sherwood, Happy Valley, Oregon City, Beaverton, Hillsboro, Gresham